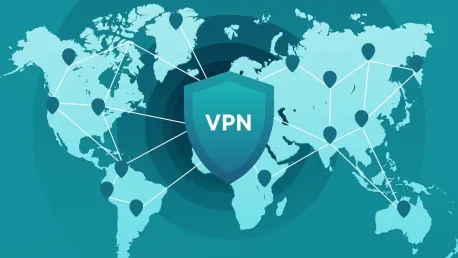

In an age where digital privacy is becoming increasingly important, virtual private networks (VPNs) have become indispensable tools for anyone concerned about safeguarding their online activities and personal data. With myriad options available, users can often find it challenging to choose the right VPN service that best fits their needs. VPNs not only encrypt your data and mask your IP address, but they also offer added security features that ensure your online presence remains private. They can also play a significant role in overcoming geo-restrictions and accessing content from different regions, adding even more value.
Virtual private networks are particularly useful when using public Wi-Fi networks or traveling, where the risk of cyber-attacks and data theft is higher. A VPN can provide accessibility to diverse streaming libraries, ensuring that you can enjoy a wide range of content no matter where you may be located. Although VPNs aren’t a magical solution for all security issues, their effectiveness in masking browsing activity and routing traffic through secure servers makes them an essential tool for maintaining privacy. Some of the top VPNs also include additional features such as ad-blockers, data breach scanners, and antivirus protection.
1. Subscribe to a VPN Service
The first step to securing your online activity through a VPN is to subscribe to a VPN service. Numerous VPN providers offer a range of packages tailored to different user needs. When selecting a service, it is important to consider factors such as speed, server availability, data privacy policies, and customer service. You can either visit the VPN provider’s official website to sign up or receive a download link via email after subscribing. Another option is to check out the Google Play Store or Apple’s App Store to download the mobile app version, making it even more convenient to get started.
After choosing a suitable VPN service and successfully completing the subscription process, download the corresponding VPN software. The VPN provider will guide you through this process, often giving you step-by-step instructions along the way. Ensuring that you download the software from legitimate sources like the provider’s official site or trusted app stores is crucial to avoid any potential security risks or malware.
2. Install the Software
Once you’ve downloaded your chosen VPN software, the next step involves installing it on your device. Open the software, and you may be prompted to provide the necessary permissions the VPN needs to function effectively — these permissions typically include access to your network settings and possibly your location. After allowing these permissions, you’ll be required to sign in using the credentials from your VPN subscription.
Installation processes vary slightly between VPN providers, but they are generally designed to be user-friendly. Most applications offer a guided setup, ensuring that even those who are not particularly tech-savvy can complete the installation process without much hassle. In most cases, a simple click-through will suffice, with the installer automatically configuring the necessary settings to get you started.
3. Select a Server Location
After successfully installing the VPN software, the next crucial step is to choose a server location and connect to the VPN. VPN providers offer a wide array of server locations across various countries, allowing users to appear as though they are accessing the internet from a different geographical location. This feature is particularly useful for bypassing geo-restrictions and accessing content that may not be available in your region. Some VPNs offer a “smart” location feature that automatically selects the most optimal server location for you, often one that is closest to your actual location to ensure better speed and performance.
For example, ExpressVPN allows users to select server locations from a long list of countries using a straightforward interface. If you have specific requirements, such as accessing a particular country’s streaming service, you can manually choose a server from that country. It’s also good to note that many VPN services show the server load and ping times, helping you pick the most efficient server for your needs.
4. Connect to the VPN
Connecting to the VPN is the final step and it’s simpler than you might think. Once you’ve selected your desired server location, all you need to do is click the connect button, and within moments, your data will be encrypted, and your online activities will be routed through the selected VPN server. The majority of VPNs will notify you once you’re successfully connected, often showing a green light or banner on their dashboard.
It’s important to ensure you’re connected before you start your online activities, particularly when dealing with sensitive information. Most VPNs have a kill switch feature that will automatically disconnect your internet connection if the VPN connection drops, thus preventing any data from being sent over an unsecured connection. While VPN settings typically work fine at their default, advanced users may want to explore additional features or customize settings to meet their specific needs.